
Probably not, but I thought this through on my own. My Internet blipped and I didn't have the desire to walk in the back, unplug the router, wait 45 seconds, replug it in, wait for it to cycle up.
I made a fabric basket. It is so cool looking and I totally love it! I am feeling it, baby! But it was plain and needed a flowery pick-me up.
 So I plunged in and did what I thought would look like a flower. And it was so damn cool. Like, really cool. Here is how I did it. (and a test to see if I can do it again or if this was just a fluke......)
Let me know what you think and if you have any questions. If you like it, say so!
 1. Cut a strip of fabric 3 1/2 (or so) inches wide WOF. Smaller widths make smaller flowers of course.
2. Iron the strip in half and sew a gathering stitch the length of the side where the raw edges meet. I didn't pay too much attention to straight or even, and found it really needed heeding. So make sure you cut a straight strip and iron it evenly. Then sew it where you catch both sides of the raw edges. I will show you what happens when you don't a bit further down.
 3. My mother taught me to run a double gathering stitch line. I always thought it was because she wanted to torture me and make me do double busy work. But when my thread broke in the middle, I finally understood. I worked it out and won't do a double stitch, just wanted to share that with those overachievers my mother would have loved to have had for a daughter instead of me.
4. When you start the gathering stitch turn down the selvage edge of the strip like this. Make a little triangle. This will be the center of your flower.

5. Look at all those strings! Yuck. They kept getting in my way. I wish I had a serger 'bout now.

 6. It looks good from the side. You want your gathers to be pretty tight. When I made the 2 1/2 inch strip I cut the WOF in half and made it smaller. That one came out just as full and you still want the gathers pretty tight together. You can see it wants to curl naturally. Try and keep it from tangling up and twisting. Yeah, just try it!
7. Begin to roll the flower. Take the triangle part and begin to roll it tightly. Oh, you will need a needle and thread. If you have a long needle use that. The first needle I grabbed was the shortest needle I ever saw. I didn't know I owned such a needle until that moment. Hmmm. You will need more thread than that too.
 8. Begin to roll from the triangle part and every once in a while take a stitch with your needle. I always tied off when I tacked a part down. For no reason, just did.
 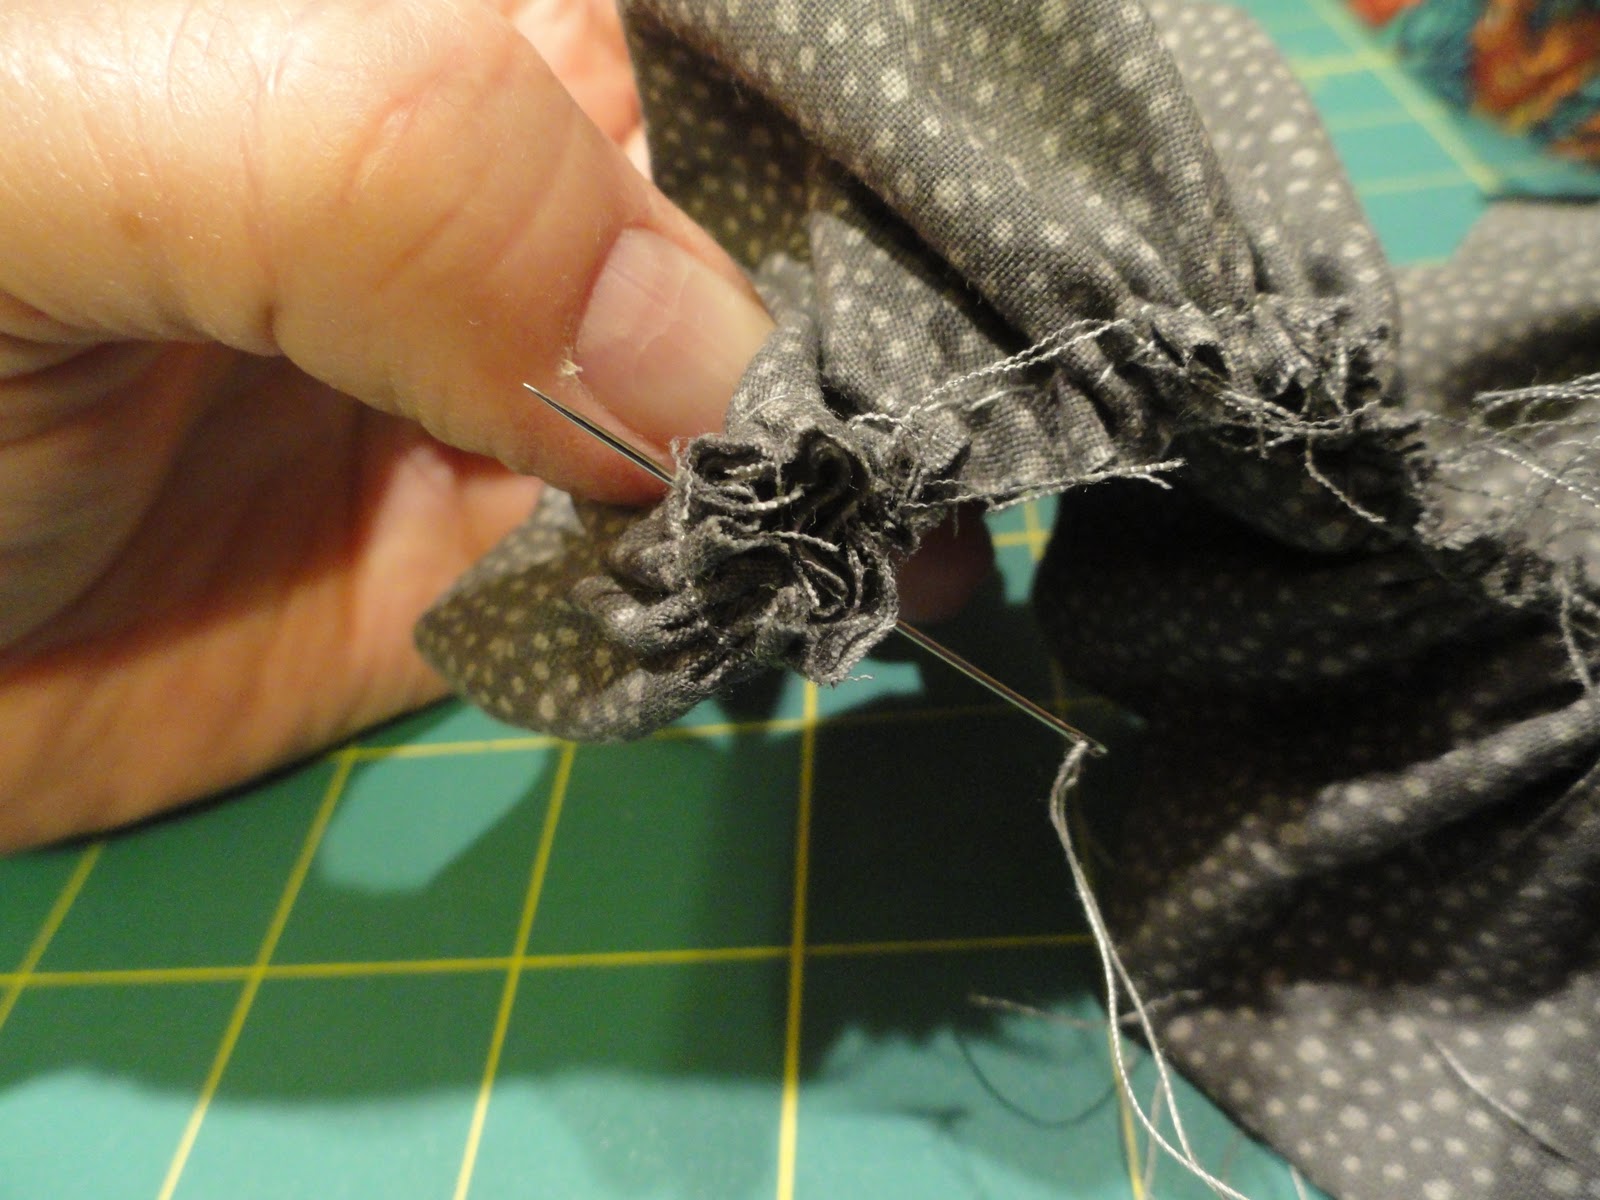 9. Keep rolling. Keep tacking. Pay attention to how you are rolling the bottom edge with all the strings. Keep it flat so you end up rolling it rather than have it slide up toward the center. My little one did that and I had problems. That one became a bud.
10. A problem. Here is the problem part where I didn't catch both sides of the raw edges in the gathering stitch. Don't know if you can see it here on the left but the edge is sticking out and I had to do flower surgery to fix it.

11. Here is the finished flower. So excitingly wonderful and fabulous! Yes!
 12. And here it is on the fabric basket that no longer looks plain and ordinary.Can you see the blue dots in the very left edge? That is the inside of the basket. The outside was obtained from the Purple Cow for $1.99. It was a curtain so it is just heavier than quilt fabric but not so heavy that it is difficult to work with. And it gives some body to the basket. It is a peachy pink and looks wonderful.
I have more plans for those baskets!
Hope you have enjoyed this tutorial.
glen
So cute! Great tutorial. Thanks.
ReplyDeleteI love it, Glen. I will be making some of these. Molly
ReplyDeleteCute!
ReplyDelete