Showing posts with label oil derrick. Show all posts

Tuesday, May 26, 2015

Art Quilts in the Bathroom


Yes.  Art Quilts in the bathroom! I guess the Hibiscus didn't make the cut!

The Row Houses was already in there, so I just put it back.  That was a challenge in River City Guild, oh, maybe 5 or 6 years ago.  I think they did it wrong though.  The deal was to have three bags.  In one bag was the type of block.  In another, an element and in another, a color.


Someone reached in and chose one from each bag and we were all asked to do the same thing.  I think it should have been where each person chose from each bag.  That way the quilts would have been unique and totally original.

Anyway, that person chose a log cabin block, in the color green and with a bird.

I won FIRST PLACE!!!  The pattern was from Flavin Glover long before she came and did a workshop here in Baton Rouge.   I loved her tiny log cabins; they finish at 3 inches so they are tiny!   My green is a greyed green on one of the rooftops, and there is a tiny weather vane with a rooster showing which way the wind is blowing.  Could be a good thing in a bathroom sometimes!

I wanted a great place to put my Iguana.  The Iguana has a real name, Lagarto de Mi Corazón.  It means Lizard of My Heart.  It was too complicated for the Swamp Show so I just shortened it to Iguana.  Which is good as well.  The figures are Anazasi Petroglyphs that I discharged from a nice black fabric.  It was made for a Challenge for River City Guild about 4 years before the Row Houses even.  It was when we met at the Library.  The challenge was to take a block and add to it or subtract from it.  We were to make something from at least two changes plus the original block.  I wanted to do something other than a quilt.  But back then the group was pretty traditional and it was not something they were interested.  I was Art Quilting before they were ready for it.

And of course, there is The Derrick tribute to almighty OIL.  It is appropriate because the Oilfield has fed, clothed and educated my family for close to 45 years.  It is not something I look at as a bad thing.  I have had friends who besmirch OIL as a bad thing, but I pay homage to it.

You can look at The Derrick as good or bad; something that has built families in Louisiana or destroyed lives.  But it has been very good to us.

And the good thing is that I can change or add or subtract art as I see fit in my own little Bathroom Art Gallery!


Monday, January 5, 2015

44 Days to QuiltCon and 0 Days to Quilt the Swamp

Patty reminded me that there is only 44 days to lose 50 lbs so I can be shape to be seen in optimum prime condition at QuiltCon!

But more importantly, 0 days to Quilt the Swamp.  I have to bring it out there tomorrow.  Finished.

Here is a  better photo of the OIL quilting.  You can really see it here. 

I squared it up.  I guess I really don't know how to square up quilts.  i always fight it.  When I got it to where I thought it was square, I measured the top at 18 inches across and the bottom at nearly 19.

What?

I need a Craftsy class on that.

Anyway, I think I finally got it square and chose grey for the binding color.  I tried several, including a really nice red.  But I think the grey keeps it in the neutral zone.

And Mr. Roomba wanted to come into the quilt room this afternoon.  I was cautious, he had only been in the rest of the house but now he suggested I let him in.  In that ever so seductive voice.  So I did.

Oh!  Was he fantastic!  He came in, took care of business and then left.   Just like a really great boyfriend!


Saturday, November 8, 2014

Louisiana Traveling Quilt #2 - Ramona's Louisiana Themed Quilt

Before
I am so much in love with the derrick idea that I had to use it on Ramona's quilt as well.  It is a Louisiana theme as well, you know.

So I did work on it some yesterday.  An finished it up in my guild's Sew Along Saturday meeting today.

I knew that white would not work with Ramona's neutrals dominant quilt top.  I chose a taupe-y grey-ish beige-ish dot piece to act as background for my oilfield.  And it is amazing how it blends with the quilt.  !

After we hit oil!
So this is how it came to me.  I thought to put  the derrick on the lower left corner to balance the long narrow drips on the uppper right corner.

So what do you think? I am thinking the person next can do some oil drops spouting out the top of my well, or maybe a flame since they do flare the natural gasses off the wells before they pump out
some black gold!

That is an amazing map block,my favorite  of the quilt......not counting my oil derrick, of course! 

Friday, November 7, 2014

The Finished Derrick

Here is the first of the derricks.  It was my practice piece.  I had the iidea in my head and I was pretty sure they would work.  But they were untested.

Here is the oil derrick completed and added to Kelly's Louisiana Traveling Quilt. It will head to Virginia this afternoon.

Birds are singing, the sun is shining, life is good and the quilt is gorgeous!  I am soooo loving it!

And I finally have something to show at Nina Marie's Off the Wall Fridays.  Go back two posts to see the procedure I used to design this block.

go see what others are doing this week!  CLICK HERE


Thursday, November 6, 2014

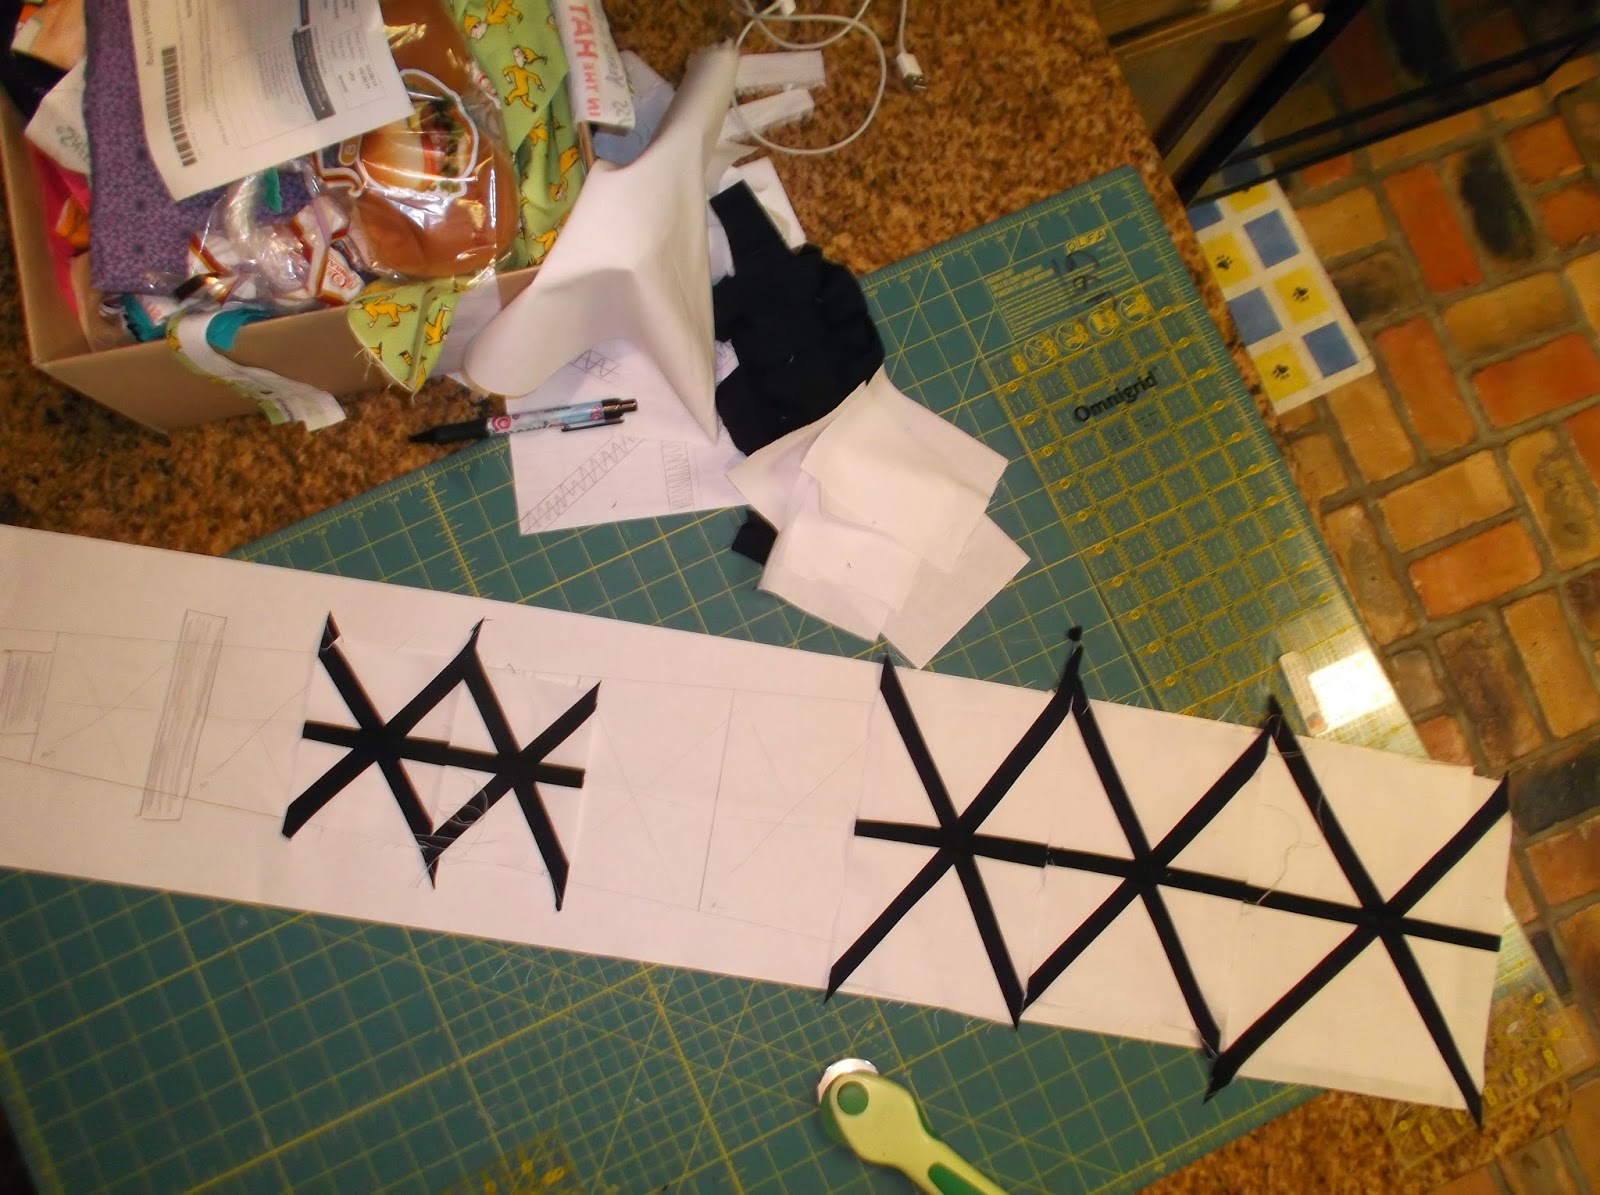
Oil Derrick Grows Toward the Sky

This is the second post today, so if you missed the first one, go back to it.

But I was too excited to wait to post tomorrow.  And I have a guild meeting tonight  so I won't get to work on it more until tomorrow.

Check it out!

(Please notice the hamburger buns in the box of scraps. I am working on my kitchen counter.)


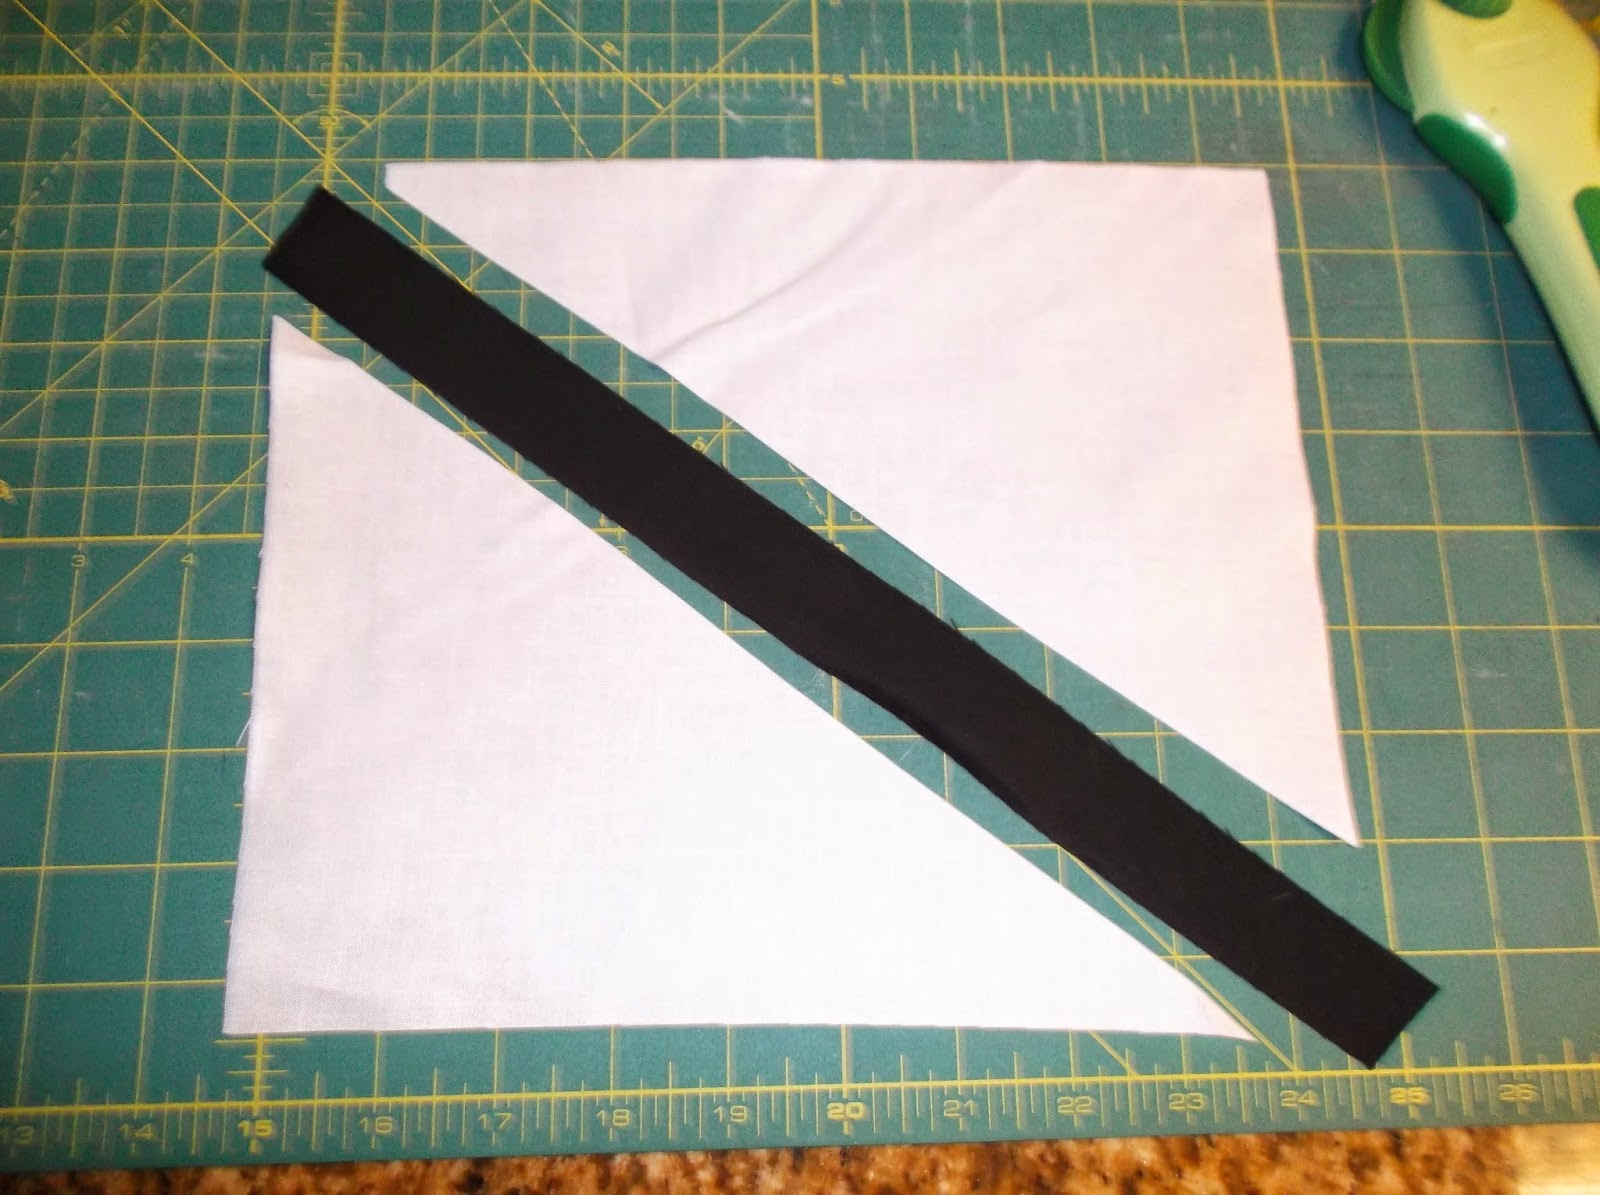
First Segment of the Scaffolding

Take a square. Slice on the diagonal.


 Cut a strip to fit the diagonal measurement and a few over, NOT the size of the rectangle.


 Sew very carefully, you are working on a diagonal and it will stretch.  Be careful and make sure you PRESS without moving your iron.   


Then slice the other diagonal.  


And cut another black strip.  Mine are 1 inch to finish at 1/2 inch.  So you do need to sew carefully and straight.  


Pretend I didn't  cut it already!  Here is what it looks like at this point.  


Slice down the center.


Insert a strip of black, press carefully.  And you have one segment.  

Needless to say, Frank was impressed.  After I got to this point I realized it was just an asterik block.  Duh!

Wednesday, November 5, 2014

Designing A Block No One Has Ever Seen Before

Designing a block no one has ever seen before is easy as pie!

I knew what I wanted to do but needed some information inspiration.  Pinterest!!!!!!  My new best friend.

And Craft Paper!  From a friend. (Thanks Tracy!)

And Help From a Friend........Frank! I just needed him to hold the dog leash while I drew lines and to say "Oh, you are SOOOOOO smart and beautiful AND talented!" 

Hey, wait, dog leash???  you ask, incredulously.  Yes, a dog leash.  You will see how perfect it was.

I have been looking at Pinterest at pictures of oil derricks for the last few days.  They are pretty much alike but from different angles.  I narrowed down an idea in my mind:  full frontal view, minimal lines and maximum height.  I needed to be about 4 to 4 1/2 feet tall and not too wide because I wanted them to be tall and thin, in an exaggerated way. 


And Industrial.  Very industrial looking.  I have big plans for this baby. the first one will be my test block. 

I wanted it in black and white.  Like I said, very industrial looking.

Measuring my paper, I decided on about 36 inches overall height.  I sketched out a basic plan.  It will by default, be a bit larger, but I am counting on that.  I sectioned off the scaffolding sections getting smaller as it went up, but in a natural looking way.  When I had what I thought would look good, I measured it off on the paper.

I needed a slight angle for the sides.  The only thing I could find that was long enough was a dog leash.  So I asked him to hold one side, while I pulled the other side straight and drew a long line exactly where I wanted it to be at the exact angle I needed.  That way I could see what angle I needed on each side.  He wanted to go outside and get all these tools and angles, but a do leash worked perfectly well.

Then I had to decide on a pattern for each segment of the rig scaffolding.  And tomorrow I will test it to make sure my thoughts are accurate in the way it will work.  I am pretty sure I am correct in what it will do when I add the strips.  And I also realized that I need to add the strips in a particular order to get the look I want.  That did occur to me at some point. 


 As you can see, I am not afraid to work outside the box.  This will be way cool, and I won't even say IF it works, because I am SURE it will work!  LOL. 

Yes, we shall see tomorrow.  Yes, we shall see..........